
Deploy an Application for C.I. on Jenkins using Maven, Trivy, Docker
Deploy Java app with Maven, Sonarqube , Trivy on the Jenkins and containerise using Docker


First, try and create the EC2 instance in the AWS
Create "DevOps" ==> t2.large (ubuntu) ==> with ssh port open 8080 and 9000
Try and install Jenkins (Ubuntu)
sudo apt install openjdk-11-jdk -y
java --version
curl -fsSL https://pkg.jenkins.io/debian-stable/jenkins.io-2023.key | sudo tee \
  /usr/share/keyrings/jenkins-keyring.asc > /dev/null
echo deb [signed-by=/usr/share/keyrings/jenkins-keyring.asc] \
  https://pkg.jenkins.io/debian-stable binary/ | sudo tee \
  /etc/apt/sources.list.d/jenkins.list > /dev/null
sudo apt update -y

sudo apt install jenkins -y
sudo systemctl start jenkins && sudo systemctl enable jenkins
sudo systemctl status jenkins
Install Docker for Sonarqube as we are going to run a docker container to make it light
[MUST REFER ABOVE REPOSITORY]
sudo apt update
sudo apt install apt-transport-https ca-certificates curl software-properties-common
curl -fsSL https://download.docker.com/linux/ubuntu/gpg | sudo gpg --dearmor -o /usr/share/keyrings/docker-archive-keyring.gpg
echo "deb [arch=$(dpkg --print-architecture) signed-by=/usr/share/keyrings/docker-archive-keyring.gpg] https://download.docker.com/linux/ubuntu $(lsb_release -cs) stable" | sudo tee /etc/apt/sources.list.d/docker.list > /dev/null
sudo apt update
apt-cache policy docker-ce
sudo apt install docker-ce
sudo systemctl status docker
sudo usermod -aG docker $USER
sudo usermod -aG docker $USER && newgrp docker
When Jenkins is installed; run it using the
http://<ec2-public-ip-address>:9000
# Initial password can get through
sudo cat /var/lib/jenkins/secrets/initialAdminPassword
Set the user as admin by entering and going with the preinstalled plugins, not custom plugins.
In Jenkins add plugins and do some changes in managing Jenkins like below

For Java => eclipse temurin
for docker ==> docker plugin
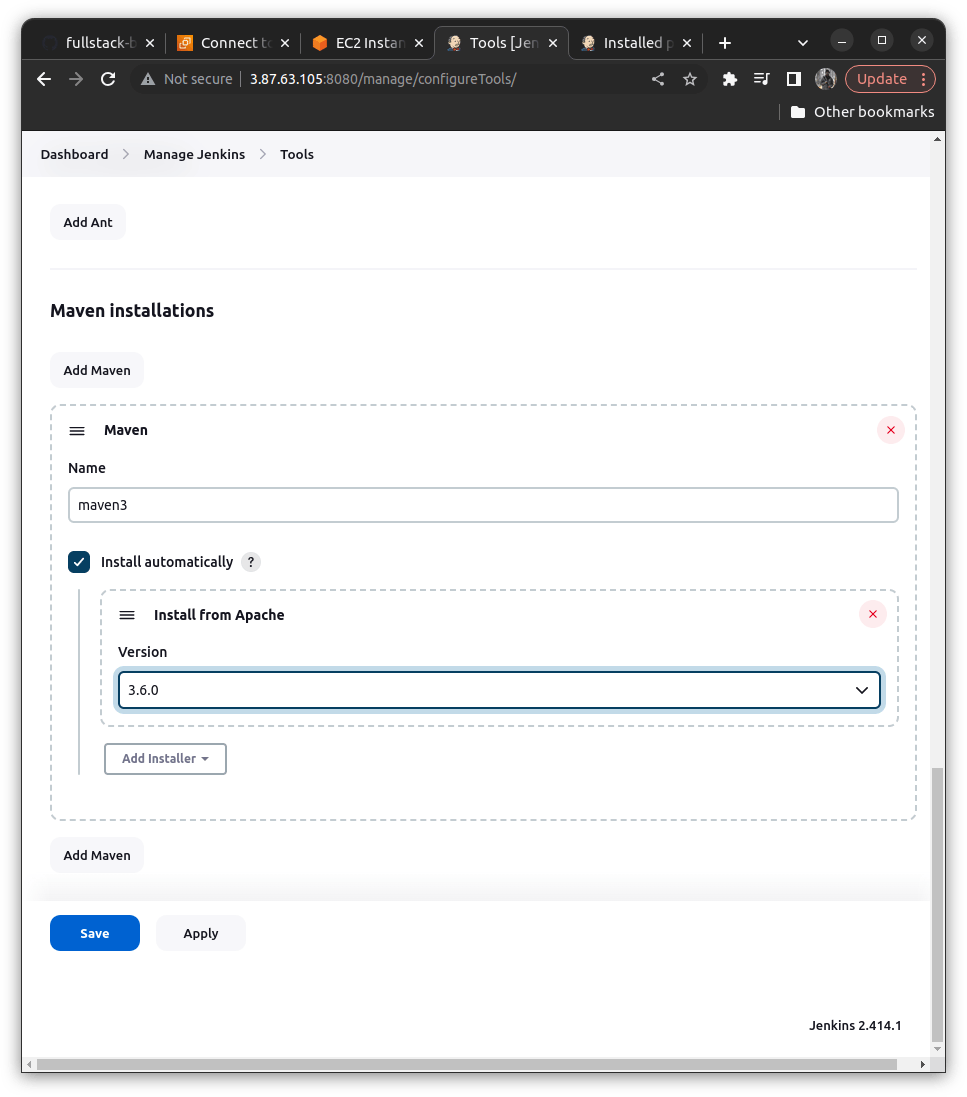
For maven ==> maven 3.6
We are going to use the declarative pipelines here in Jenkins. Let us dissect the parts below and understand how our pipeline is going to work here
pipeline {
    agent any

    tools {
        jdk 'jdk17'
        maven 'maven3'
    }

    environment{
        SCANNER_HOME= tool 'sonar-scanner'
    }


    stages {
        stage('GIT CHECKOUT') {
            steps {
                git branch: 'main', changelog: false, poll: false, url: 'https://github.com/adityadhopade/Devops-CICD.git'
            }
        }

        stage('COMPILE') {
            steps {
                sh "mvn clean compile"
            }
        }

        stage('SONARQUBE ANALYSIS') {
            steps {
               withSonarQubeEnv('sonar-scanner') {
                 sh '''  $SCANNER_HOME/bin/sonar-scanner -Dsonar.projectName=Devops-CICD \
                 -Dsonar.java.binaries=. \
                 -Dsonar.projectKey=Devops-CICD '''
                }
            }
        }

        stage('TRIVY SCAN') {
            steps {
                sh "trivy fs  --security-checks vuln,config /var/lib/jenkins/workspace/CICD"
            }
        }

        stage('BUILD CODE') {
            steps {
                sh "mvn clean install"
            }
        }

        stage('DOCKER BUILD') {
            steps {
                script {
                    withDockerRegistry(credentialsId: 'docker-cred', toolName: 'docker-latest') {
                        sh "docker build -t cicddevops ."
                    }
                }
            }
        }

        stage('DOCKER PUSH') {
            steps {
                script {
                    withDockerRegistry(credentialsId: 'docker-cred', toolName: 'docker-latest') {
                        sh "docker tag cicddevops adityadho/cicddevops:$BUILD_ID"
                        sh "docker push adityadho/cicddevops:$BUILD_ID"
                    }
                }
            }
        }
    }
}
Tools are used to decipher the tools which we are using globally in the pipeline
    tools {
        jdk 'jdk17' // tooltype : name
        maven 'maven3'
    }
environment is used to define our tool
     environment{
        SCANNER_HOME= tool 'sonar-scanner'
    }
Here we are adding our path to the sonar-scanner in the SCANNER_HOME environment variable
In stages under steps, we first need to check out our repository. It can be generated via the Pipeline Syntax Generator
        stage('GIT CHECKOUT') {
            steps {
                git branch: 'main', changelog: false, poll: false, url: 'https://github.com/adityadhopade/Devops-CICD.git'
            }
        }
Now as our code is Java Code we need to build it but before building the code we need to compile the code using a build tool Maven
        stage('COMPILE') {
            steps {
                sh "mvn clean compile"
            }
        }
Now what we can do is we can perform static code analysis to find out various bugs, code smells etc. using sonarqube. The syntax is generated via Pipeline Syntax
        stage('SONARQUBE ANALYSIS') {
            steps {
               withSonarQubeEnv('sonar-scanner') {
                 sh '''  $SCANNER_HOME/bin/sonar-scanner -Dsonar.projectName=Devops-CICD \
                 -Dsonar.java.binaries=. \
                 -Dsonar.projectKey=Devops-CICD '''
                }
            }
        }
To understand it more we are going to use SonarQubeEnv('sonar-scanner') is the name of our sonar-scanner.
$SCANNER_HOME/bin/sonar-scanner # Adding the current path of $SCANNER_HOME
-Dsonar.projectName=Devops-CICD # used to name our project as Devops-CICD
-Dsonar.java.binaries=. \ # it as java project so we will require the java binaries
-Dsonar.projectKey=Devops-CICD # Add it as project key
Further after static code analysis, we are going to use Trivy a simple and comprehensive vulnerability scanner for containers and other artifacts. Generally used as a DevSecOps tool but can also be used in ours.
        stage('TRIVY SCAN') {
            steps {
                sh "trivy fs  --security-checks vuln,config /var/lib/jenkins/workspace/CICD"
            }
        }
Trivy scans our filesystem with the following parameters like --security-checks vuln,config
Also scans our location which is "/var/lib/jenkins/workspace/CICD"

Workspace can easily be determined in the Jenkins it is where our content of the build obtained while ntegrating with GIT will be stored
[For installation of trivy must visit]
Then we start building the application using Maven
        stage('BUILD CODE') {
            steps {
                sh "mvn clean install"
            }
        }
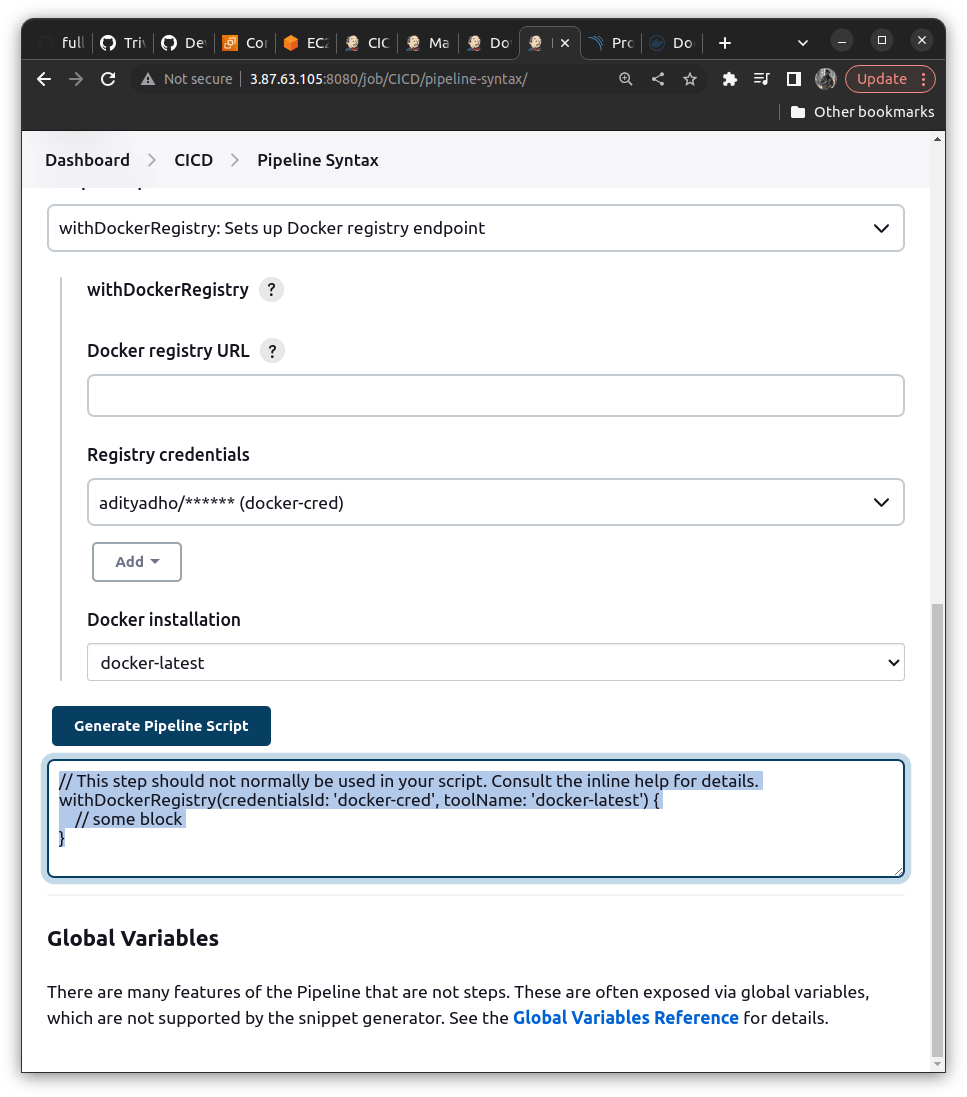
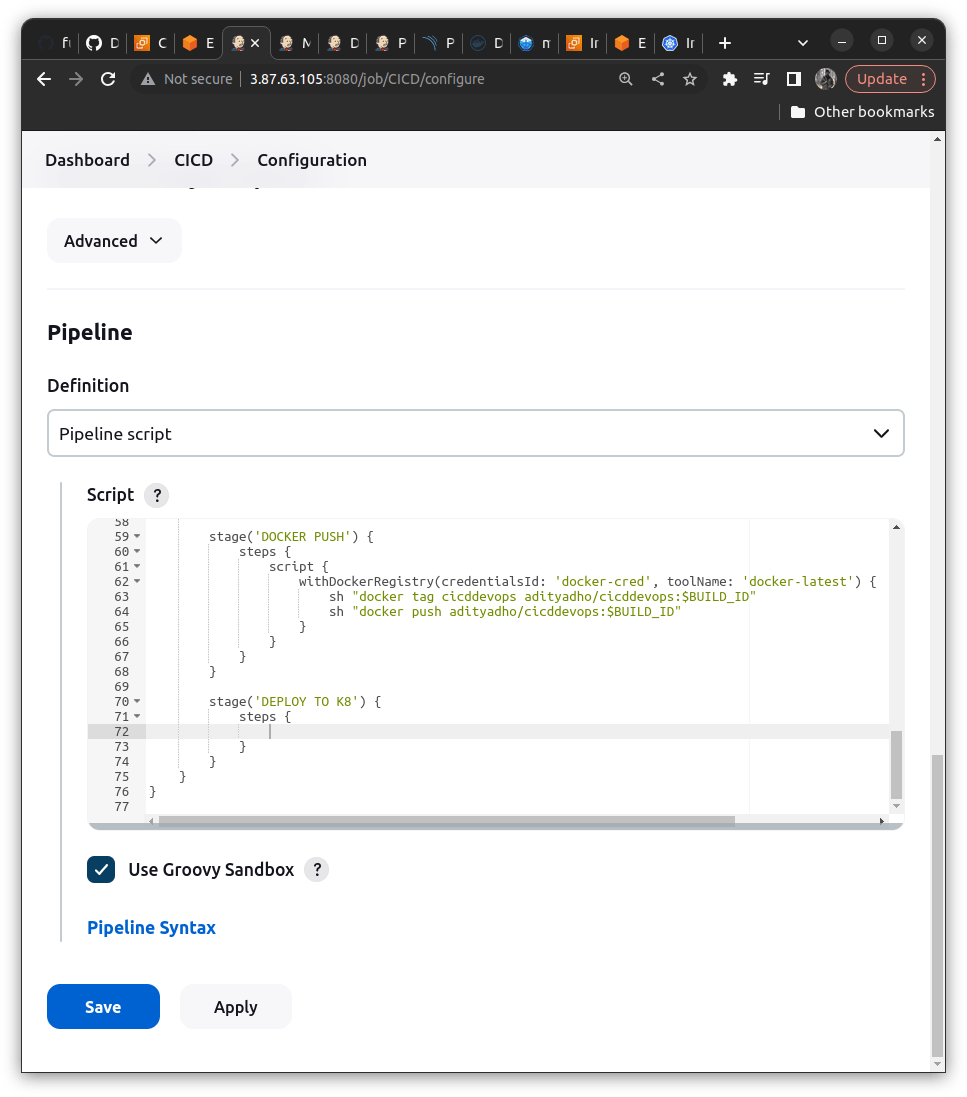
then we need to dockerize the build file and store it(pushing) in the docker hub and the syntax can be obtained through the Pipeline Syntax. The purpose of docker is to package the environment along with the application.
        stage('DOCKER BUILD') {
            steps {
                script {
                    withDockerRegistry(credentialsId: 'docker-cred', toolName: 'docker-latest') {
                        sh "docker build -t cicddevops ."
                    }
                }
            }
        }

# docker build -t cicddevops . ==> It means we are naming the cicddevops name we are providing and "." indicates from what it will build (we need to give path of the Path of the DockerFile which contain all commands and instructions of what to do in here)
stage('DOCKER PUSH') {
steps {
script {
withDockerRegistry(credentialsId: 'docker-cred', toolName: 'docker-latest') {
sh "docker tag cicddevops adityadho/cicddevops:$BUILD_ID"
sh "docker push adityadho/cicddevops:$BUILD_ID"
}
}
}
}
# sh "docker tag cicddevops adityadho/cicddevops:$BUILD_ID" ==> We are taggging here with the format <dockerhub-username>/<repo_name>:<Version_of_build>
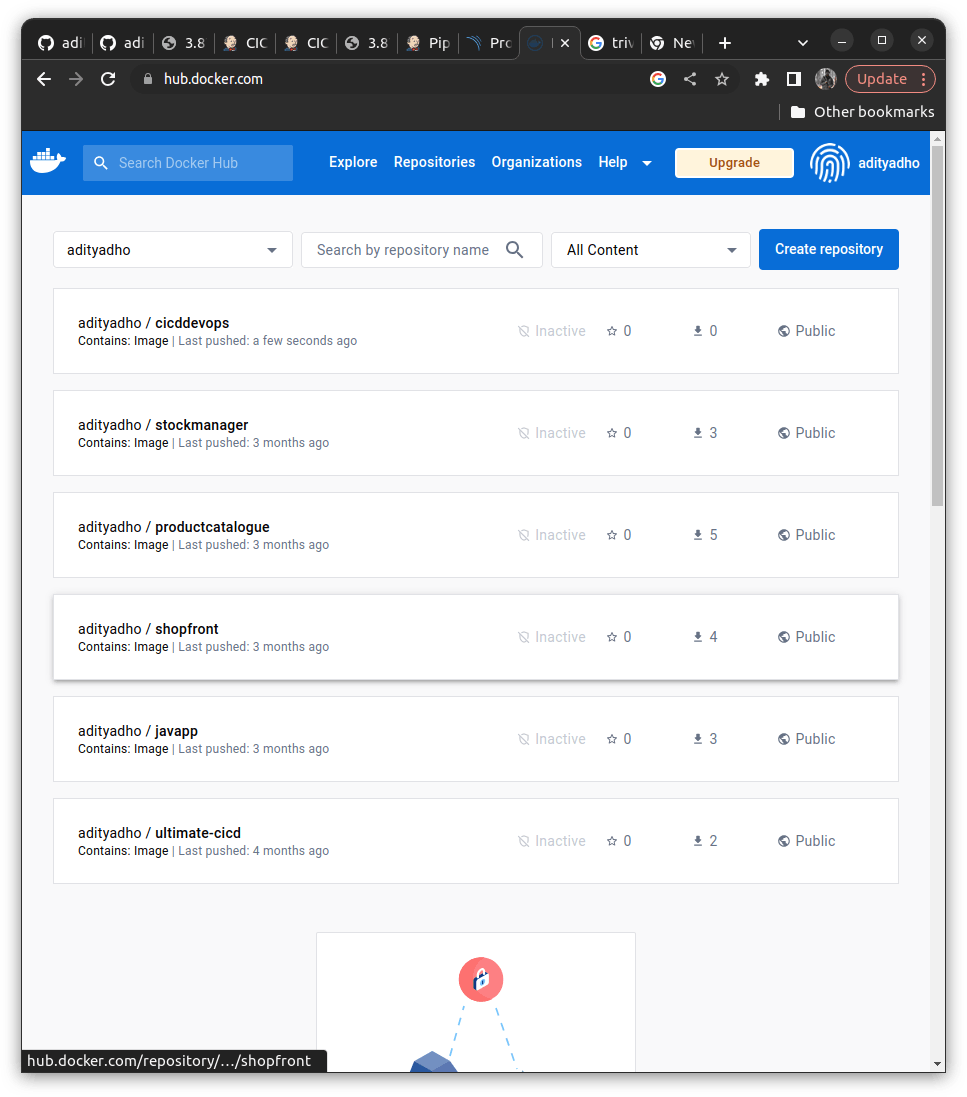
# sh "docker push adityadho/cicddevops:$BUILD_ID" ==> It pushes our code to the dockerhub repository "adityadho/cicddevops:$BUILD_ID" (Newly created)
Now for the Installations, we get to the installations of plugins part is very essential.
Now to use the Sonarqube in our docker container run
docker run -d --name sonarqube -p 9000:9000 -p 9092:9092 sonarqube
Login into the Sonarqube
use credentails admin and admin for both username and passowrd
username: admin
password: admin
Generate a Token ==> Administration ==> Security ==> USers ==> Tokens
Generate a new token for 30 days and save that hash value somewhere safe
name token as sonar-token
token will look like this squ_55192125159271cc07fc035a437a677780f3d3e7
Now move to Jenkins Dashboard
Install Sonarqube Scanner ==>
Go to Dashboard(DB) ==>In manage Jenkins ==>Under Tools ==> Search "Sonar"
Add the name as sonar-scanner
Install the latest version
DB ==> Manage Jenkins ==> System
Find Sonarqube Servers
Before that just copy the token generated at Sonarqube. To establish the link between the sonarqube and Jenkins
Path to copy is like
manage Jenkins ==> Credentials ==> GLobal ==> Add ==> Secret text
name it as sonar-cred
Now fill in the details of the Soanrqube Server
name: sonar-server
url: <ec2-public-ip-address>:9000
token: <Add token here>
Also, we need to have some configurations for the Docker initially set up
Add Docker plugin From the Add plugins and its latest version and in manage Jenkins tools add the credentials for the docker hub within it.
If you are getting stuck. I may have left some things unintentionally as this demo stretched for a bit I have attached my repository above try to test it out and configure it yourself you will surely learn something new.