Deploy Real Time Chat App on Docker using Terraform
Deploy Real Time Chat App on Docker using Terraform


🚀 Just Released: Deploy RealTime ChatApp on Docker Using Terraform! 🎮
I'm excited to share my latest project - a classic Real Time Chat App implemented by Terraform for full-fledged deployment on Docker. DockerHub is used to host the containerized chat application, ensuring easy distribution and management of the application's container images.
Real-time Chat App is created using the NodeJs, VanillaJs, and ExpressJs and we are deploying it on the EC2 instance which is created using the Terraform as an I.A.C tool also running shell scripts for the installations of required tools on the EC2 Instance created by Terraform.
Consider the repository below for getting the source of the project. The chart application consists of the following technologies NodeJs, Vanilla Js, and Socket.io for real-time messaging.
🌟 Key Tools and Moments:
DockerFile (For the creation of the Containers)
Applying the Terraform Scripts
Running the Terraform Scipts (To create the Infrastructure Resources)
Setting up data sources and Subnets in Terraform
Creation of Security Group
Creation of Null Resources
Dealing with File Provisioner, Remote Exec Provisioner
Applying Shell Script to install dependencies.
PREREQUISITES:
Preconfigured credentials of AWS using the AWS CLI
AWS CLI Users need to have privileges Admin Access(Ease of Convenience)
Terraform installed
Docker Installed
Node Installed (Above 16)
Terraform Basics
[MUST] Clone the App from the Repository below
Let us first try to run the application locally we can run the application using in the folder in the root folder of the project
node server.js
A> Getting started with DockerFIle Creation
For the real-time chat application, we have used the following steps
# It indicates the base image to be used for the application
FROM node:16.20.1

# When a conatiner is created; setting the Working Directory as "app"
WORKDIR /app

# Need to copy the package.json explictly before (answered in Trivia below)
COPY package.json ./

# To install all the dependencies of the project
RUN npm install

# Copies everyting from the current directory to the containers current directory "/app"
COPY . .

# Our application is Exposed on the PORT 3000 (Does it really exposes application ?; Answered in Trivia below)
EXPOSE 3000

# Commands to run when container starts (EnTRYPOINT also does the same ? Answered in Trivia below)
CMD ["npm", "run", "start"]
DOCKERFILE Trivia:
Q1. Why do we need to COPY the package.json file separately?
Because Docker images are built in layers and each line in a Dockerfile represents a layer. With each layer, the size and complexity also start increasing.
Consider if we do not copy the package.json explicitly then we are going to copy all our current changes into the app folder.
 WORKDIR /app
 COPY . /app
 RUN npm install
Then docker will execute npm install for each change. It's very bad and not efficient. As for each little change, you will reinstall whole nodejs packages (and if you not using volume or cache it will take a long time).
So rather than that we are just moving explicitly copying the package.json file
we will execute npm install only when package.json changes (some package added or removed so on).
FROM node:16.20.1
WORKDIR /app
COPY package.json ./
Q2. Does EXPOSE 3000 really expose the application?
What expose really does is let the Developer know on which PORT our application is running
The actual exposing is done by "Publish" which we know as "-p" flag in Docker.
Q3. ENTRYPOINT vs CMD
ENTRYPOINT: Command to run when the container starts.
ENTRYPOINT cannot be overridden at run time with normal commands such as docker run [args]. The args at the end of docker run [args] are provided as arguments to ENTRYPOINT. In this way, we can create a container which is like a normal binary such as ls.
ENTRYPOINT can be overridden with --entrypoint.
CMD: Command to run when the container starts OR it gives arguments to ENTRYPOINT if specified.
Argument to docker run such as /bin/bash overrides any CMD command we wrote in the Dockerfile.
So CMD can act as default parameters to ENTRYPOINT and then we can override the CMD args from [args].
They Both are used to run the commands
You can override any of them when running docker run.
Difference between CMD and ENTRYPOINT by example:
docker run -it --rm yourcontainer /bin/bash            <-- /bin/bash overrides CMD
                                                       <-- /bin/bash does not override ENTRYPOINT
docker run -it --rm --entrypoint ls yourcontainer      <-- overrides ENTRYPOINT with ls
docker run -it --rm --entrypoint ls yourcontainer  -la  <-- overrides ENTRYPOINT with ls and overrides CMD with -la
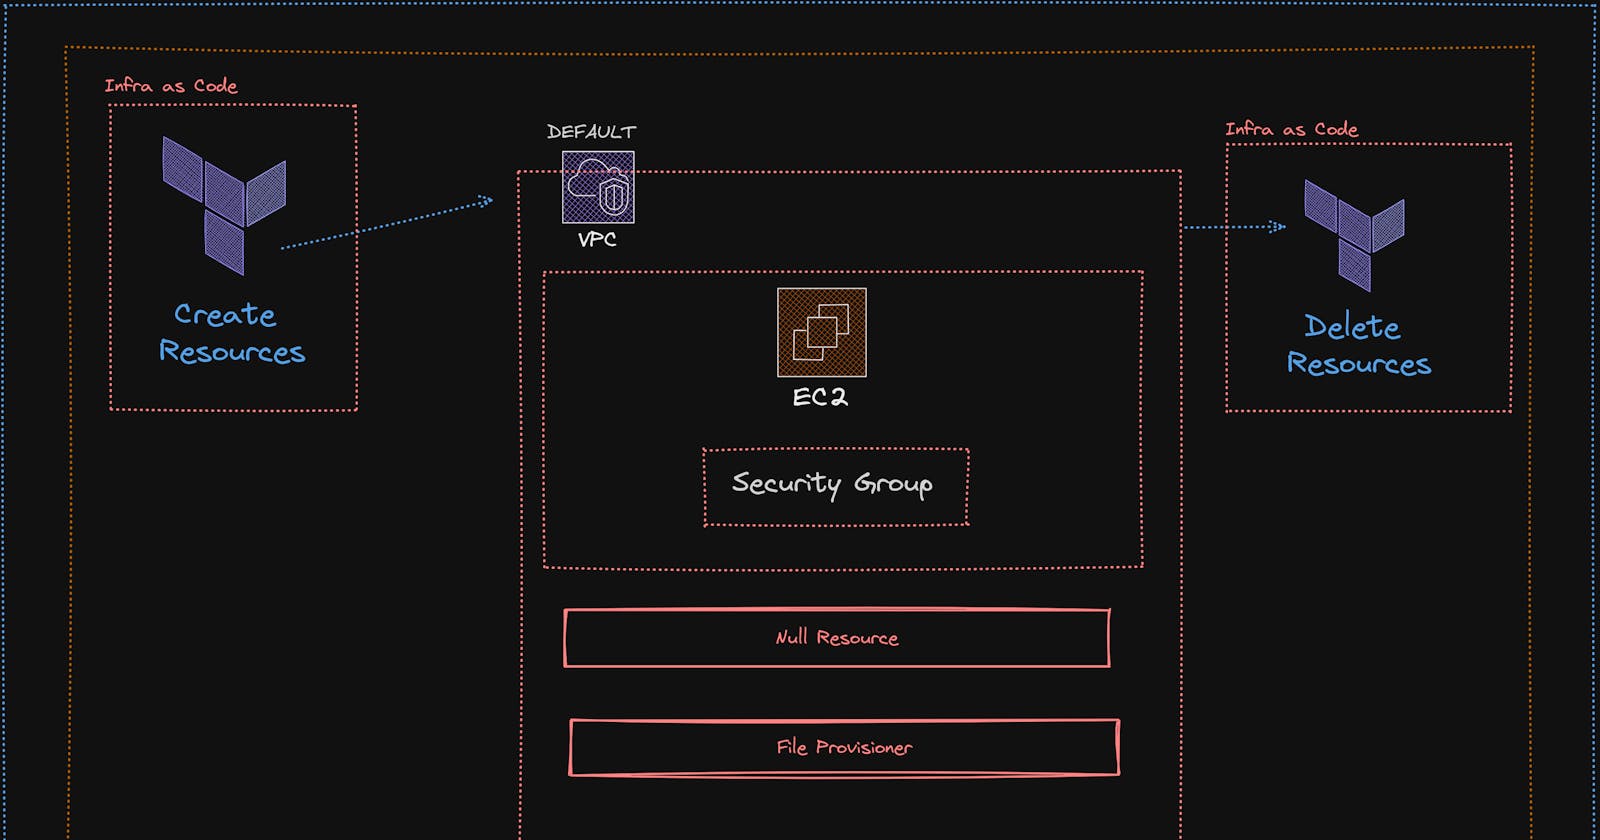
B> Provisioning Resources using Terraform
We are considering the file ec2.tf and for understanding, we are breaking it into parts here like
Configuring the Cloud Provider we are here using AWS; where setting up the region and a profile.
# configured aws provider with proper credentials
provider "aws" {
  region  = "us-east-1" # change according to your desired region
  profile = "default" # change according to desired user profiles
}


# create default vpc if one does not exit (USing the default one only here)
resource "aws_default_vpc" "default_vpc" {
  tags = {
    Name = "default vpc"
  }
}
Create the DataSource to fetch all the Availability Zones in your desired region in my case "us-east-1" and also add up a Default VPC if not already exist then create one (usually it is present for each region but still added to make it tightly coupled).
# use data source to get all avalablility zones in region (us-east-1)
data "aws_availability_zones" "available_zones" {}


# create default subnet if one does not exit
resource "aws_default_subnet" "default_az1" {
  availability_zone = data.aws_availability_zones.available_zones.names[0]

  tags = {
    Name = "default subnet"
  }
}
Now to get limited access to our instances created we need to add the "Security Groups"; we are allowing all the access to the instance via PORTS.
# create security group for the ec2 instance
resource "aws_security_group" "ec2_security_group" {
  name        = "docker_server_ec2_group" # setti
  description = "allow access on ports 80 and 22"
  vpc_id      = aws_default_vpc.default_vpc.id

  ingress {
    description = "http access"
    from_port   = 80 # defines a range of PORTS but we need only one
    to_port     = 80 # defines a range of PORTS but we need only one
    protocol    = "tcp"
    cidr_blocks = ["0.0.0.0/0"] #accessible from anywhere
  }

  ingress {
    description = "ssh access"
    from_port   = 22 # defines a range of PORTS but we need only one
    to_port     = 22 # defines a range of PORTS but we need only one
    protocol    = "tcp"
    cidr_blocks = ["0.0.0.0/0"] # accessible from anywhere
  }

  ingress {
    description = "app accessible on the port"
    from_port   = 3000 # For our app to be acessible on EC2
    to_port     = 3000 # For our app to be acessible on EC2
    protocol    = "tcp" # connection protocol set as tcp
    cidr_blocks = ["0.0.0.0/0"] # accessible from anywhere
  }

  egress {
    from_port   = 0
    to_port     = 0
    protocol    = -1
    cidr_blocks = ["0.0.0.0/0"]
  }

  tags = {
    Name = "docker server sg"
  }
}
Further, we are setting up the data source to search for the amazon ami image and we have used the filters to narrow our search.
NOTE: If you select a different region then the ami_id will also change so need to make the changes accordingly.
# use data source to get a registered amazon linux 2 ami
data "aws_ami" "amazon_linux_2" {
  most_recent = true
  owners      = ["amazon"]

  filter {
    name   = "owner-alias"
    values = ["amazon"]
  }

  filter {
    name   = "name"
    values = ["amzn2-ami-hvm*"]
  }
}
Launching the EC2 Instance with the ami image we got from the data source above.
NOTE : We are using here "tf-chat-app" as the pem key (which was already generated manually), you need to create or add the key if not present.
resource "aws_instance" "ec2_instance" {
  ami                    = data.aws_ami.amazon_linux_2.id
  instance_type          = "t2.micro"
  subnet_id              = aws_default_subnet.default_az1.id
  vpc_security_group_ids = [aws_security_group.ec2_security_group.id]
  key_name               = "tf-chat-app"

  tags = {
    Name = "docker server"
  }
}
MOST IMPORTANT SECTION
We need to add the null resource to add our shell script which contains all the installations that need to be done on the EC2 instance
Using the connection block here to establish the SSH connection
File Provider is used to copy the file from the local source to the destination; it internally uses the SCP for this.
Remote-exec provisioned is used to run/ execute the commands/scripts on the remote location; (yes we can do that in Terraform). In our context, we are applying the script that is present in the "build-docker-image. sh" (also making the script executable)
depends-on is used to set the dependencies between the resources; in our context, the null provider will not execute until and unless there is the creation of EC2 via terraform.
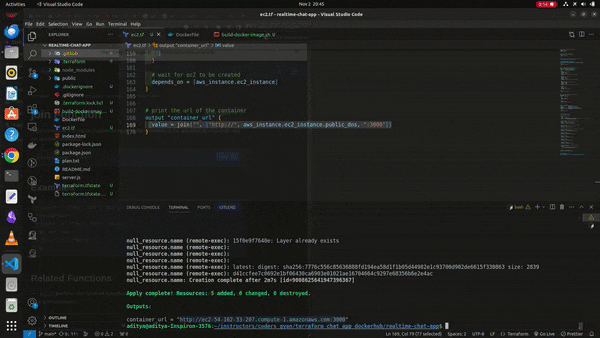
output block is used to show the URL which we can use to connect to the chat application.
# an empty resource block
resource "null_resource" "name" {

  # ssh into the ec2 instance
  connection {
    type        = "ssh"
    user        = "ec2-user" # as we are using amazon linux image
    private_key = file("~/Downloads/tf-chat-app.pem") #same-key-pair as that of ec2 genaratioon
    host        = aws_instance.ec2_instance.public_ip
  }

  # copy the password file for your docker hub account
  # from your computer to the ec2 instance

  provisioner "file" {
    source      = "~/Downloads/my_password.txt"
    destination = "/home/ec2-user/my_password.txt"
  }

  # copy the dockerfile from your computer to the ec2 instance
  provisioner "file" {
    source      = "Dockerfile"
    destination = "/home/ec2-user/Dockerfile"
  }

  # copy the build_docker_image.sh from your computer to the ec2 instance
  provisioner "file" {
    source      = "build-docker-image.sh"
    destination = "/home/ec2-user/build-docker-image.sh"
  }

  provisioner "file" {
    source      = "package.json"
    destination = "/home/ec2-user/package.json"
  }

  provisioner "file" {
    source      = "server.js"
    destination = "/home/ec2-user/server.js"
  }

  provisioner "file" {
    source      = "public"
    destination = "/home/ec2-user/public"
  }

    provisioner "file" {
    source      = "index.html"
    destination = "/home/ec2-user/index.html"
  }

  # set permissions and run the build_docker_image.sh file
  provisioner "remote-exec" {
    inline = [
      "sudo chmod +x /home/ec2-user/build-docker-image.sh",
      "sh /home/ec2-user/build-docker-image.sh"
    ]
  }

  # wait for ec2 to be created
  depends_on = [aws_instance.ec2_instance]
}


# print the url of the container
output "container_url" {
  value = join("", ["http://", aws_instance.ec2_instance.public_dns])
}
TERRAFORM TRIVIA
Q1. Can Terraform only use DataSource on the resources it has created?
NO; Terraform can use DataSource on any of the resources even if it is not created by Terraform but it should be from that provider only.
Q2. Security Group (SG) vs NACL
The difference is in the tier of execution actually
Security group ==> It generally acts upon the Instance level, provides the Instance level security
NACL ==> It provides the Subnet Level security, operates at the subnet level, and controls traffic in and out of a VPC.
Q3. Why cidr_blocks = ["0.0.0.0/0"]?
It is settled for the time being so that all the traffic from the Internet is allowed and can access the EC2 Instance. (Not recommended though it is just for demo purposes)
Q4. What is a Null Provider?
The Null provider is a rather unusual provider that has constructs that intentionally do nothing. This may sound strange, and indeed these constructs do not need to be used in most cases, but they can be useful in various situations to help orchestrate tricky behavior or work around limitations.
Q5. Do we need to use providers at all? is it recommended?
NO; It is not recommended to use the Providers as they are not updated and the support for certain providers is generally avoided in the first place; rather support for some in-house providers is considered fruitful.
Q6. Does the order of execution of providers matter?
YES; it matters if some provider is dependent on another then the order matters if it is not present then it would be like
C> Creating the script to install on the Provisoned EC2 resources
We have created a file named "build-docker-image.sh" locally we need all its content in the EC2 Instance as it contains all the setups and also building the Docker Image.
First, create a terraform repository named "terraform-chatapp" and set it as Public. We need to do this because we will push our image into this repository.
We need to install Docker, Node, and npm
# create a repository to store the docker image in docker hub

# install and configure docker on the ec2 instance
sudo yum update -y
sudo amazon-linux-extras install docker -y
sudo service docker start
sudo systemctl enable docker

sudo chmod 777 /var/run/docker.sock

#install node
sudo yum install nodejs -y
node -v


#install npm
sudo yum install npm
Further, we will create a docker file in this so we can have it running
# create a dockerfile

# build the docker image
sudo docker build -t tf-chat-app .

# login to your docker hub account as to avoid password saving here we are giving it in root folder
cat ~/my_password.txt | sudo docker login --username adityadho --password-stdin

# use the docker tag command to give the image a new name
sudo docker tag tf-chat-app adityadho/terraform-chatapp

# push the image to your docker hub repository
sudo docker push adityadho/terraform-chatapp

# start the container to test the image
sudo docker run -dp 3000:3000 adityadho/terraform-chatapp
By using this we are not adding up our password in the script and the password to our Docker Hub is actually stored inside the "my_password.txt" in the root folder. In my case, it is under "/home/ubuntu/my_password.txt"
cat ~/my_password.txt | sudo docker login --username adityadho --password-stdin
So the overall script looks like this
#!/bin/bash

# create a repository to store the docker image in docker hub

# install and configure docker on the ec2 instance
sudo yum update -y
sudo amazon-linux-extras install docker -y
sudo service docker start
sudo systemctl enable docker

sudo chmod 777 /var/run/docker.sock

#install node
sudo yum install nodejs -y
node -v


#install npm
sudo yum install npm

# create a dockerfile

# build the docker image
sudo docker build -t tf-chat-app .

# login to your docker hub account as to avoid password saving here we are giving it in root folder
cat ~/my_password.txt | sudo docker login --username adityadho --password-stdin

# use the docker tag command to give the image a new name
sudo docker tag tf-chat-app adityadho/terraform-chatapp

# push the image to your docker hub repository
sudo docker push adityadho/terraform-chatapp

# start the container to test the image
sudo docker run -dp 3000:3000 adityadho/terraform-chatapp
But when will it run?
It will actually run in the Terraform script's Remote Exec provisioner that we have explained above.
After all the hassle just go the the project root directory and run the following terraform commands commands
terraform init
terraform validate
terraform plan
terraform apply --auto-approve
The Instance will get created and it will run on the instances as the following gif below
Working Sample
I hope you find the content valuable and I would encourage folks to try out the demo and get your hands dirty; I am sure that it will work for you; It requires lots of time and effort to prepare this Demo to make it work; If stuck take help of the Chatgpt or google it will surely help you out.
Do follow my endeavors at