Enforce Automated K8's Cluster using Kyverno Policy Generator and ArgoCD
Run Kubernetes Automated Cluster using Kyverno and ArgoCD


What's the deal with Kyverno?
Kyverno is an open-source policy engine designed specifically for Kubernetes. It provides a Kubernetes-native way to define and enforce fine-grained policies for your Kubernetes cluster. Kyverno enables you to create policies that automatically validate, mutate, or generate Kubernetes resources based on a set of defined rules.
With Kyverno, you can define policies in the form of YAML files, which specify conditions and actions to be applied to Kubernetes resources. These policies can be used to enforce security best practices, compliance requirements, resource quotas, naming conventions, and other configuration rules. Kyverno integrates tightly with Kubernetes, dynamically intercepting and modifying resource requests and responses to enforce the defined policies.
One of the key features of Kyverno is its ability to generate and mutate resources. This means you can define policies that automatically generate or modify Kubernetes resources based on certain conditions.
What Kyverno does is that it simplifies policy management by providing a declarative way to define policies and an easy-to-understand policy language. It also provides extensive validation and simulation capabilities, allowing you to test policies before applying them to your cluster.
It generally boils down to the day-to-day activities of the DevOps Engineer's duties
Continuous Integration and Continuous Deployment (CI/CD)
Infrastructure Automation:
Configuration Management:
Monitoring and Logging:
Cloud Infrastructure Management
Collaboration and Communication:
Performance Optimization
Security and Compliance
So Kyverno is the one that deals with the duty of the DevOps Engineer in the field of Security and Compliance
What is Compliance?
Compliance in DevOps refers to the adherence to regulatory, security, and industry standards and guidelines within the context of software development and operations processes. It involves ensuring that the software development lifecycle and the operational practices meet the required compliance standards.
What is Admission Controller in Kubernetes?
An admission controller is a component that intercepts and evaluates requests to the Kubernetes API server before they are persisted or executed. Admission controllers enforce policies and make decisions regarding the admission or rejection of API requests based on predefined rules.
Scenario: Let there be a Kubernetes Cluster that has 50GB of RAM and 100's Pods deployed on it; let us suppose a POD is leaking the memory and is itself taking the 50GB RAM. What will happen to the rest of the PODS?
The solution can be to set the resource request/limit set in the deployment file. So that every POD created inside the cluster should have proper resource request and limits.
How do we define the Compliance Rules (Governance Rules)?
DevOps Engineers need to manage according to the compliance of the organisation. For Writing Compliances in Kubernetes, it has the Admission Controller.
While creating a POD cluster or node everything goes via the KUBE API; Kube API internally passes it to the Admission Controller and it validates if PODs have the resource request or limits set also if not present then the PODs can't be created.
Why is Kyverno required?
But writing the Admission controller comes with its repetitive tasks and a steep learning curve.
Scenario: What if we want to change or modify the Compliance then we need to write another Admission Controller for each rule; (while it used to be like that in some earlier days DevOps folks used to invest a lot of their time in writing the Admission Controllers)
Also, the controllers should be written in Golang and not every DevOps Engineer is fond of Golang.
So using Kyverno we can manually do the governance of the Kubernetes Cluster; How Kyverno works here is that it acts as Dynamic Admission Controller.
Dynamic Admission Controller does is it validates that if the PODs have the resource request limits set and if not then the pod's creation will not work as it is not matching the standards of Kyverno Policy of the organization.
Now let's move to the implementation part.
Install Keyverno it can be done in two ways
Using Helm
Using Kubernetes Manifest files
Refer to the Github Link for all the Steps that need to be followed
[Kyverno Integration K8's Github Link ] (https://github.com/adityadhopade/kyverno-k8-argocd)
I have followed the Installation via Manifest Files.
Take the sample policy ; I am here considering the resource request limits yml file in the [link](https://github.com/kyverno/policies/blob/main/best-practices/require-pod-requests-limits/require-pod-requests-limits.yaml)
Firstly Add the Policy to our local cluster
kubectl apply -f https://raw.githubusercontent.com/kyverno/policies/main/best-practices/require-pod-requests-limits/require-pod-requests-limits.yaml
Checking for the Pods created
kubectl get pods
NOTE: Kyverno gets created in its namespace named kyverno
We can verify it by checking the logs
kubectl logs <kyverno-hashvalue> -n kyverno
As per our rules set in the policies we are bound to create the pods with the resource request limits in each of the POD
The resource request limits in the yml file
apiVersion: kyverno.io/v1
kind: ClusterPolicy ## The policy is impacting the Cluster Level so it will monitor all the namesapces in the Cluster
metadata:
  name: require-requests-limits
  annotations:
    policies.kyverno.io/title: Require Limits and Requests
    policies.kyverno.io/category: Best Practices, EKS Best Practices
    policies.kyverno.io/severity: medium
    policies.kyverno.io/subject: Pod
    policies.kyverno.io/minversion: 1.6.0
    policies.kyverno.io/description: >-
      As application workloads share cluster resources, it is important to limit resources
      requested and consumed by each Pod. It is recommended to require resource requests and
      limits per Pod, especially for memory and CPU. If a Namespace level request or limit is specified,
      defaults will automatically be applied to each Pod based on the LimitRange configuration.
      This policy validates that all containers have something specified for memory and CPU
      requests and memory limits.
spec:
  validationFailureAction: audit
  background: true
  rules:
  - name: validate-resources
    match:
      any:
      - resources:
          kinds:
          - Pod
    validate:
      message: "CPU and memory resource requests and limits are required."
      pattern:
        spec:
          containers:
          - resources:
              requests:
                memory: "?*"
                cpu: "?*"
              limits:
                memory: "?*"
Now to test out whether our Kubernetes policy is working properly or not; add the deployment of the Nginx server and try to create a pod without adding the resource request limits to the pods.
kubectl create deployment nginx --image=nginx
kubectl get pods | grep nginx
While running the above command you could see that the deployment is getting created but the pods are taking time to create. Why so?
It's because of the compliance that we have pushed upon it.
But a question should arise how would a user know that there is some policy which is restricting this?
For this, we need to look at the following field in the above yml file
spec:
  validationFailureAction: audit
Whenever there is a failure it just shows it in the audited logs of the Kyverno policy it sort of acts like a warning in the code which people generally ignore.
To sort this out instead of the audit we could use the enforce as we need to strictly impose while creating the Kubernetes resources
spec:
  validationFailureAction: enforce
As we have made changes in the deployed file we need to again deploy it back;
## Delete before uploading the file
kubectl delete deploy nginx
kubectl logs <kyverno-hashcode> -n kyverno
kubectl create deployment nginx --image=nginx
It will not allow us to create the deployment of the nginx as it does not match our policy standard.

Git Hub Repo Link
[Kyverno Integration K8's Github Link ] (https://github.com/adityadhopade/kyverno-k8-argocd)
Now creating the ArgoCD Dashboard
kubectl create namespace argocd #create namespace

##Apply the YAML Files
kubectl apply -n argocd -f https://raw.githubusercontent.com/argoproj/argo-cd/stable/manifests/install.yaml

#Get pods if created
kubectl get pods -n argocd
Check services in argocd namespace
kubectl get service -n argocd ## Check for the services
Access the ArgoCD API Server; can be done in three ways
## 1.Service Type Load Balancer
kubectl patch svc argocd-server -n argocd -p '{"spec": {"type": "LoadBalancer"}}'

## 2. Port Forwarding
kubectl port-forward svc/argocd-server -n argocd 8080:443

## 3. Ingress Configuration with ArgoCD [Reference Link]
https://argo-cd.readthedocs.io/en/stable/operator-manual/ingress/

kubectl get service -n argocd
To access the ArgoCD Dashboard then we get just copy the External IP Address in the Browser
To Login into the ArgoCD Dashboard, we need to do the following
# Credentials to enter are as follows
# Username: admin
# Passowrd: Needs to be generated

kubectl get secrets -n argocd argocd-initial-admin-secret -o yaml

#Whatever the Output of the command will be the Password
echo <generated_hash_code> | base64 --decode

# Credentials to enter are as follows
# Username: admin
# Passowrd: generated hash value
We need to link the Our Repository to the ArgoCD. The steps for creating it are as follows (Attached a screenshot below)
The details for the above app are as follows:
project - default
cluster - https://kubernetes.defaults.svc
namespace - k8app
repo url - Your Repository
path - /
Sync Options - CreateNamespace
Sync: Auto
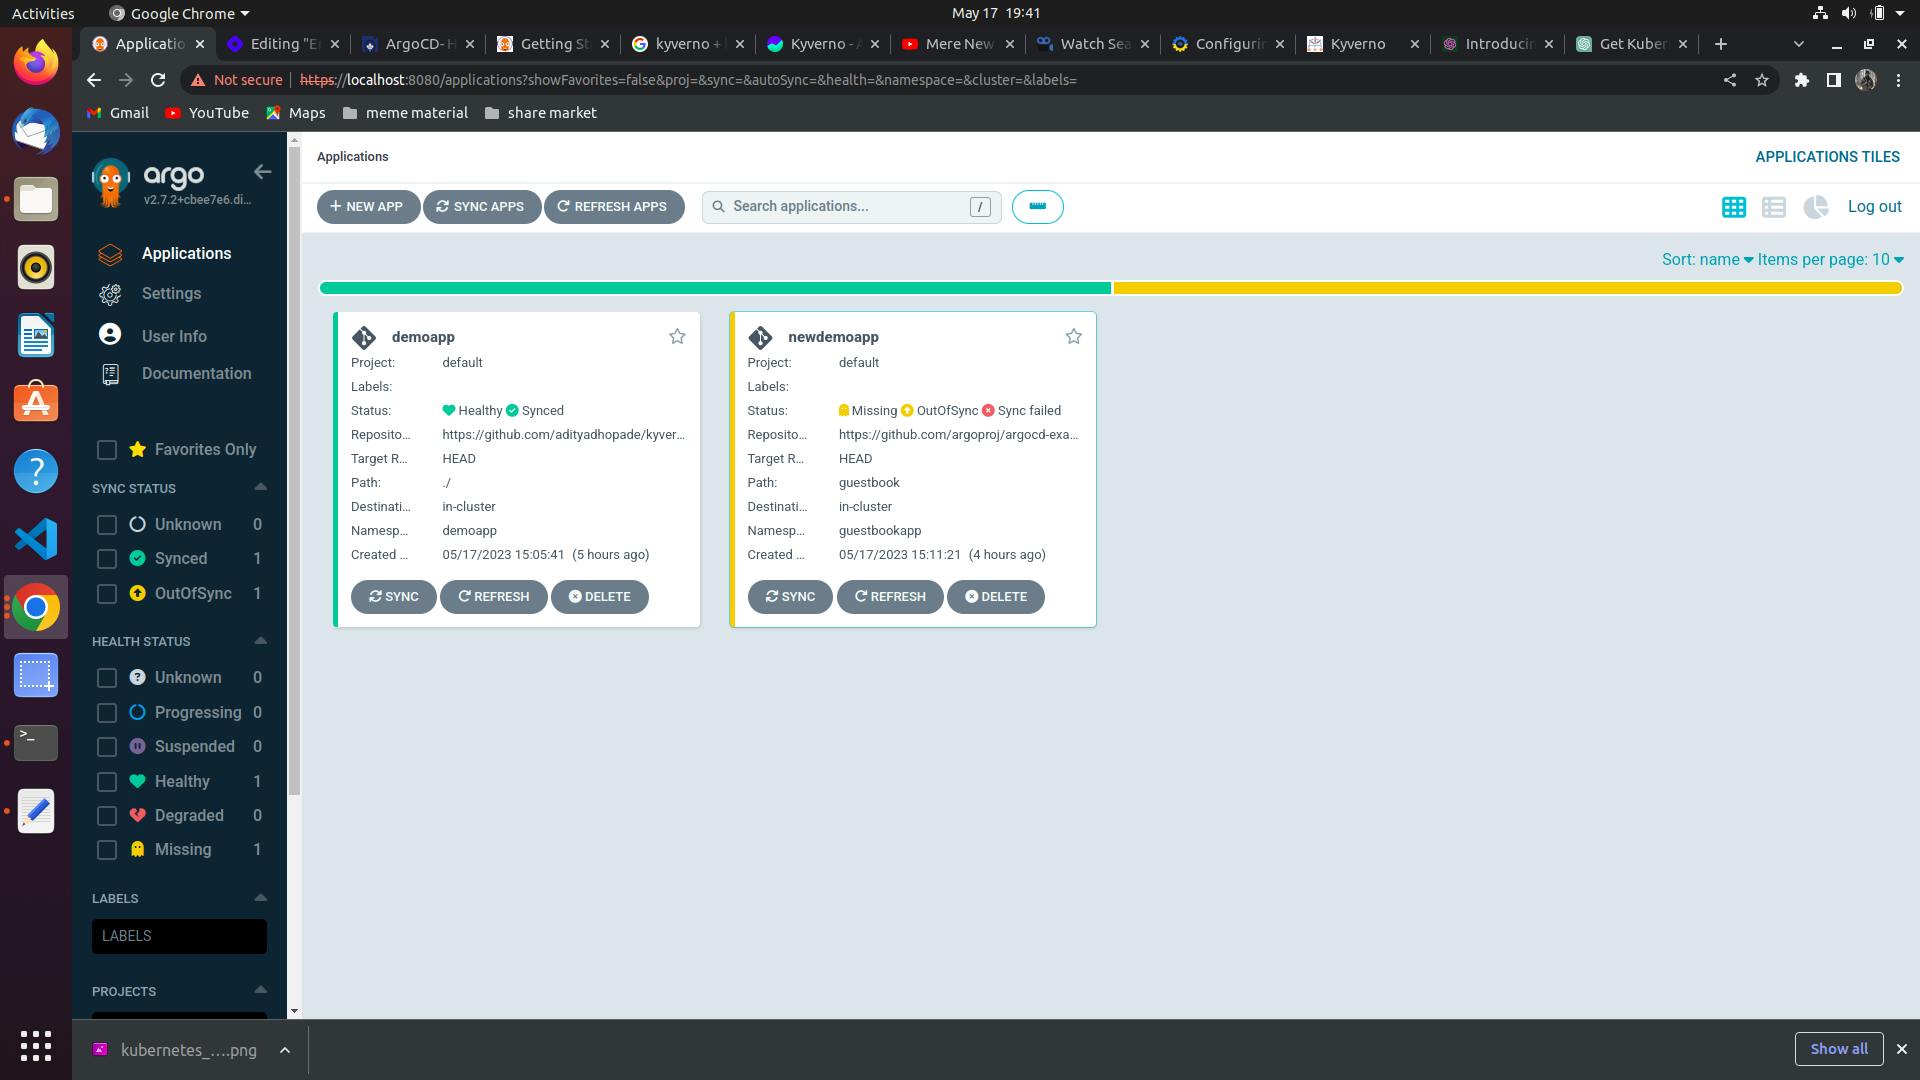
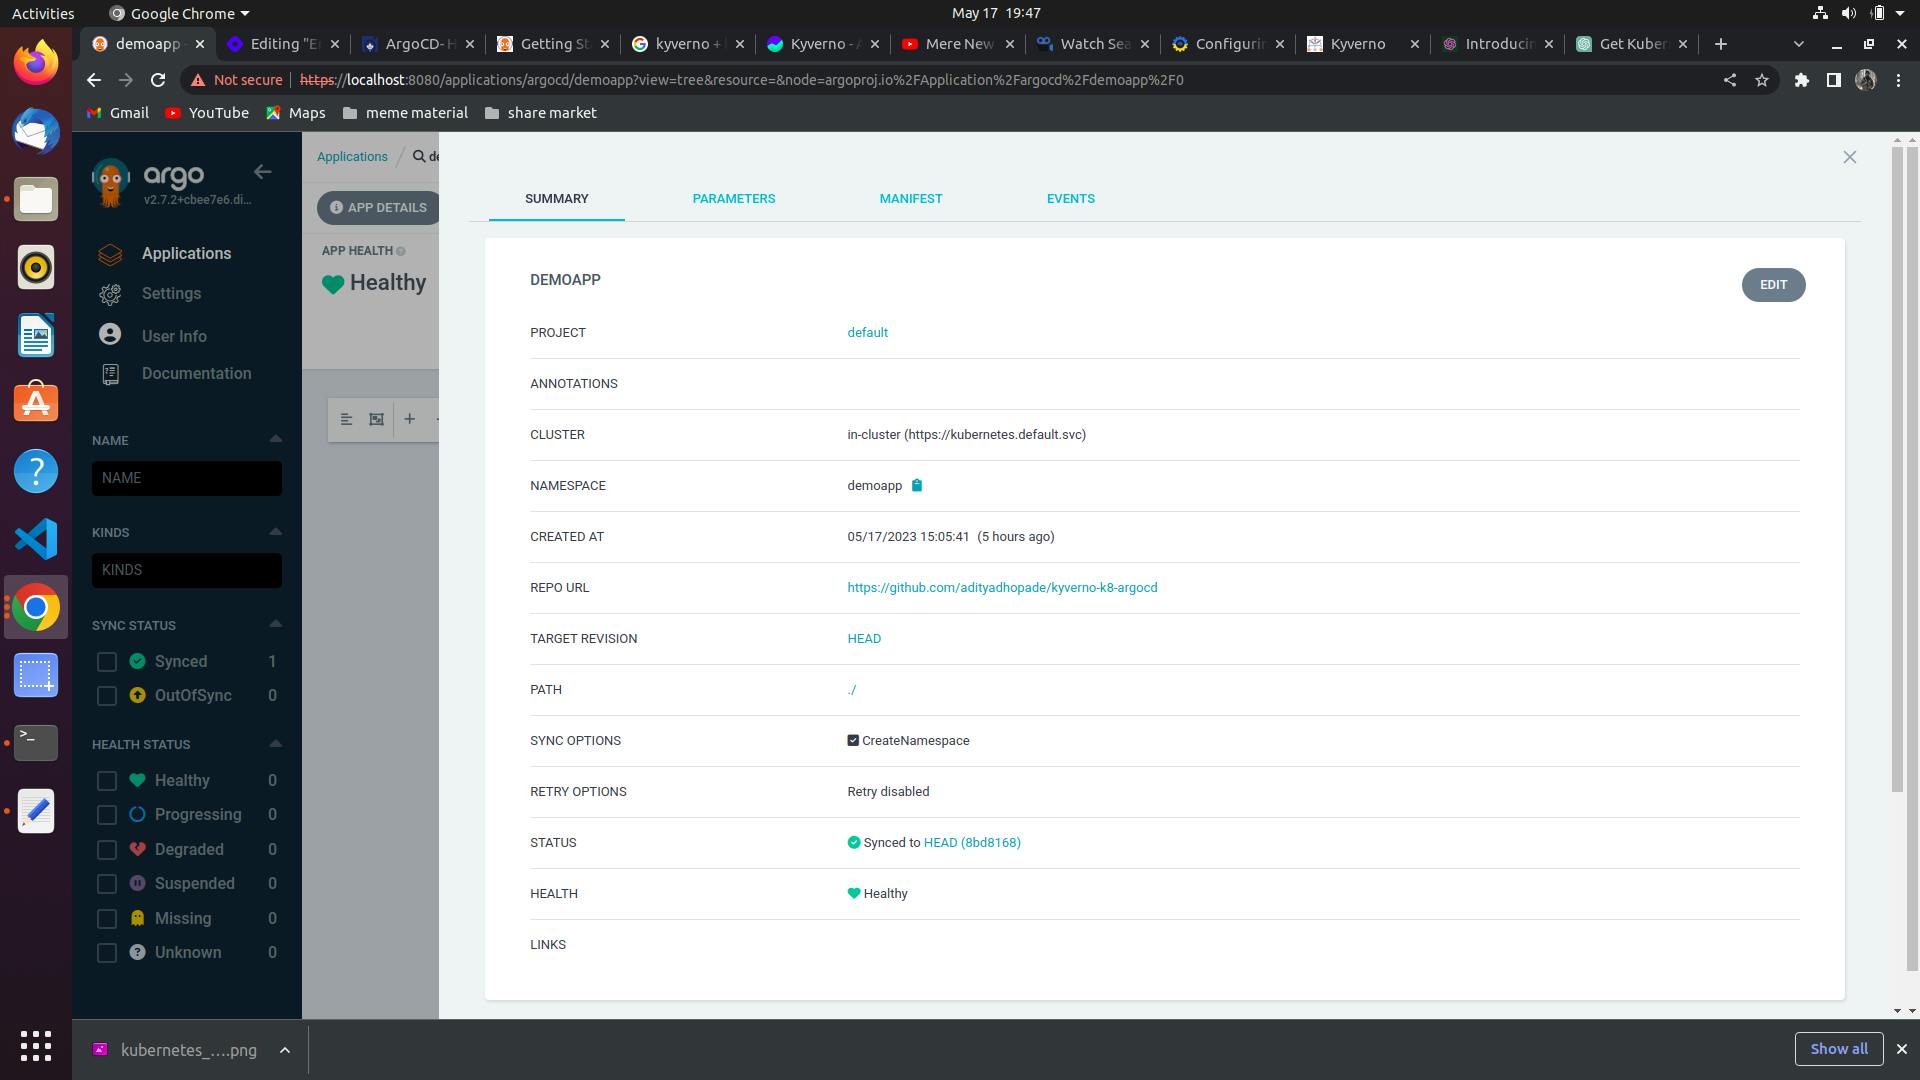
The screenshot below is what you would be getting in the ArgoCD Dashboard
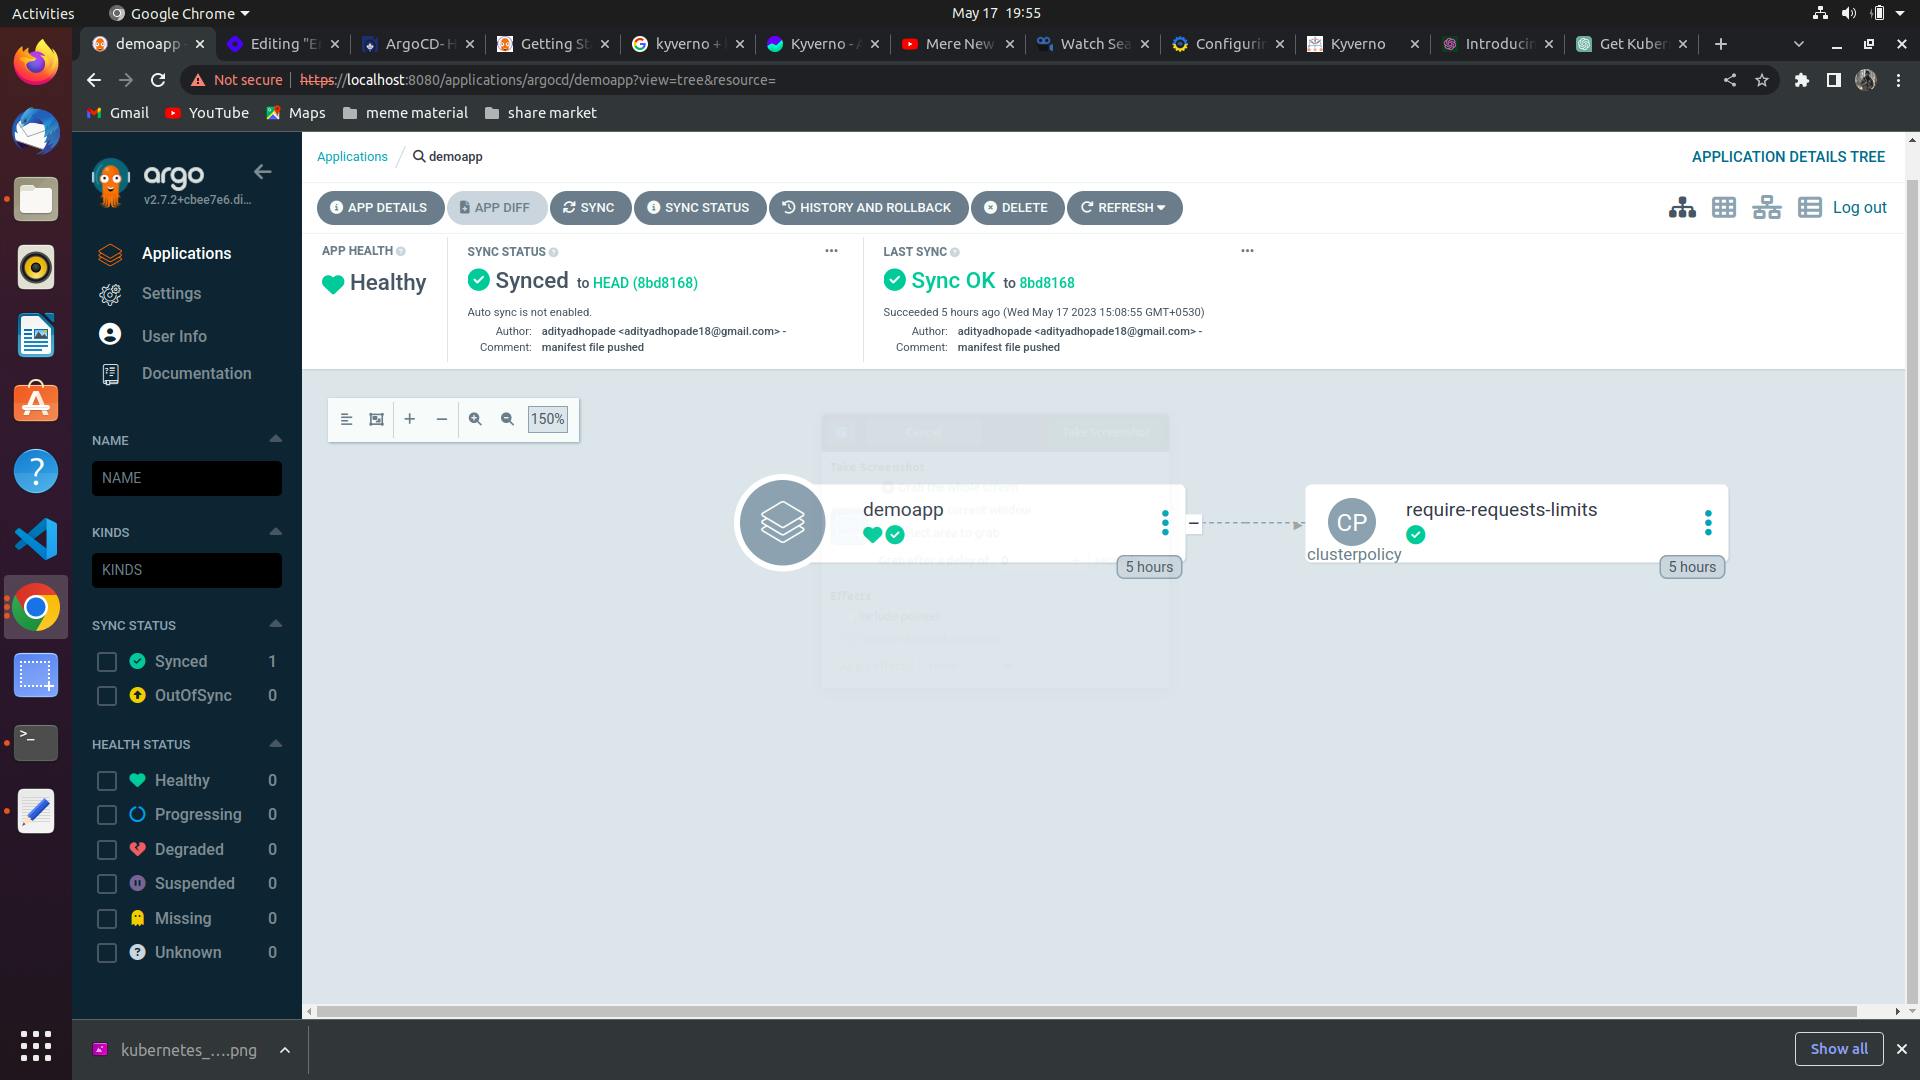
By deploying it on the ArgoCD we have now made the Kyverno Policy Generator automated as
I hope that it sheds some light on the Kyverno, Kubernetes and ArgoCD integration. Stay tuned for the next ones.