Packer to create AMI Golden Image in AWS
Using packer to create Golden Images in the AWS Cloud


Let us first simplify the keywords that are used in the title; so that there will be no sprout of doubt.
Prerequisites [Must Visit ]:
- Must have an AWS Account with AWS CLI Installed; also create the access and secret key for your user.
Create AWS Access Key and Secret Key
Attach IAM Policy to User. [Add administrator access for demo purpose]]
- Installed Packer in your local machine.
What is Packer?
Packer is an open-source tool for creating identical machine images for multiple cloud platforms from a single source of configuration. It is cloud-agnostic.
Packer is a product of Hashicorp just like Terraform (used for Developing the Infrastructure as Code) and Vault (used for secret management)
A common misconception is that Packer can replace configuration management like Chef or Puppet. When building images, Packer can use tools like Chef or Puppet to install software onto the image.
Why to use Packer?
Packer automates the creation of any type of machine image. It embraces modern configuration management by encouraging you to use a framework such as Chef or Puppet to install and configure the software within your Packer-made images.
What is AMI?
Amazon Machine Images: An Amazon Machine Image (AMI) is a supported and maintained image provided by AWS that provides the information required to launch an instance.
AMI must be specified while launching the instance.
We can launch multiple instances from a single AMI when you require multiple instances with the same configuration.
Need of Golden AMI?
Let us consider these scenarios
Scenario: Suppose we want to use the resource containing Jenkins and Ansible the most trivial way would be just creating instances and then adding the setup for those applications but it will take lots of time and effort.
Scenario: When want to use the same image in the distributed network with the same level of configurations and settings[This can be especially useful in environments where multiple instances need to be created, such as in a load-balanced or auto-scaling group.]
So in the above case, there is a dire need for the Golden Image. Let us quickly move to the implementation part now
Implementation of Packer
Create a folder "image-builder"\==> Add the file named "provider.pkr.hcl". It is used for setting up the provider in packer [.hcl acts as an extension to packer]
// Take reference from here: https://developer.hashicorp.com/packer/plugins/builders/amazon
packer {
  required_plugins {
    amazon = { // we are setting up aws as our cloud provider to develop images on it
      version = ">= 1.2.6"
      source = "github.com/hashicorp/amazon"
    }
  }
}
ami.pkr.hcl \==> It would be used for image creation
source "amazon-ebs" "this" {
  access_key    = var.aws_access_key // that we have obtained from the AWS User
  secret_key    = var.aws_secret_key // that we have obtained from AWS USer
  region        = var.region
  source_ami    = data.amazon-ami.this.id
  instance_type = var.instance_type
  ssh_username  = var.ssh_user_name
  ami_name      = local.image_name
}

build {
  sources = [
    "source.amazon-ebs.this"
  ]
}
add variable.pkr.hcl \==> It contains all the variables that we have used in the ami.pkr.hcl file.
variable aws_access_key {
  description = "AWS Access Key"
  type = string
  default = "<your-user-access-key>"
}

variable aws_access_key {
  description = "AWS Secret Key"
  type = string
  default = "<your-user-secret-key>"
}

variable region {
  description = "AWS region"
  type        = string
  default     = "us-east-1"
}

variable instance_type {
  description = "instance type to launching AMI"
  type        = string
  default     = "t3.micro"
}

variable ssh_user_name {
  description = "ssh user name for instance"
  type        = string
  default     = "ec2-user"
}

variable app_name {
  description = "app name for web server image"
  type        = string
  default     = "web-server-image"
}
NOTE: I recommend using environment variables here to store the access key and secret key. As it's a better security practice.
Create data.pkr.hcl ==> It contains the Data Source files of the Packer.
data "amazon-ami" "this" {
  filters = {  // using the filters here to select the specific image
    virtualization-type = "hvm"
    root-device-type    = "ebs"
    name                = "al2023-ami-*"
  }
  owners      = ["137112412989"] // aws will be the owner of this but if selected different image can be different also
  most_recent = true
  region      = var.region
}
Commands to execute Packer Files
1. To initialise the packer ==> packer init ./image-builder/ (If packer folder is child folder) else ==> packer init .

2. To validate the packer ==> packer validate ./image-builder/ (If packer folder is child folder) else ==> packer validate .

3. To format the packer ==> packer fmt ./image-builder/ (If packer folder is child folder) else ==> packer fmt .

4. To build the packer ==> packer build ./image-builder/ (If packer folder is child folder) else ==> packer build .
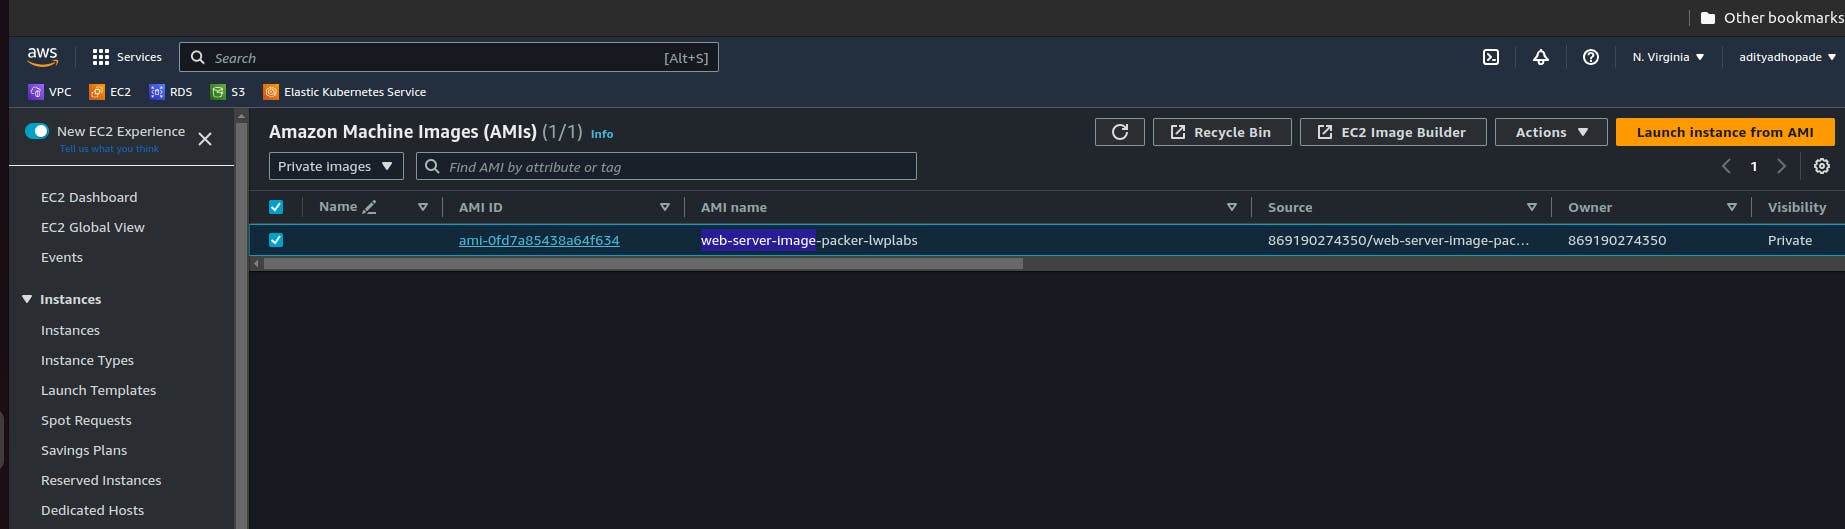
Now if we want to verify if our AMI build exists or not we can verify it with the help of the AWS Console
AWS Console --> EC2 Instance --> (Side navigation) Images --> AMI's
We can verify that our AMI is build with the name starting from web-server-image
I hope that you gain some insights regarding the packer and its basic work to create the golden images.