

Prerequisites for setting up Jenkins
We are setting up the Jenkins Server with the help
AWS Account
1 Jenkins Master Node and 1 Jenkins Slave Node
EC2 instance (t2 medium; ubuntu; 20 GB storage)
PORT 8080 open (For Jenkins)
Why there is a need for Agents?
Often in the POC, we see the users creating their pipeline on the single Jenkins Node (Good for POC; dreadful for the Production Scenarios)
Agents facilitate the scaling of the Infrastructure and get us far from the Single Point of Failure.
it supports various environments and platforms making it favorable to use.
Using Agents we are making sure that the Master remains free and all the load gets distributed among the Agents.
Agents can be used to restrict access based on user roles or project requirements.
Provides fault tolerance by having multiple agents (they internally distribute load among themselves and are grouped by the label names).
We will just get started with all the setups and then move on to the practical
Further Installation on Master and Slave JENKINS Nodes
# Install the Java on both Master and Slave
sudo apt update
sudo apt install openjdk-11-jdk -y
java --version

# Install Jenkins
curl -fsSL https://pkg.jenkins.io/debian-stable/jenkins.io-2023.key | sudo tee \
  /usr/share/keyrings/jenkins-keyring.asc > /dev/null
echo deb [signed-by=/usr/share/keyrings/jenkins-keyring.asc] \
  https://pkg.jenkins.io/debian-stable binary/ | sudo tee \
  /etc/apt/sources.list.d/jenkins.list > /dev/null
sudo apt update -y
sudo apt install jenkins -y
sudo systemctl start jenkins && sudo systemctl enable jenkins
sudo systemctl status jenkins
sudo usermod -aG sudo jenkins

# <COPY THE BASH PASSWORD FROM THE HASH>
sudo cat /var/lib/jenkins/secrets/initialAdminPassword
In Slave Jenkins Node
Create User Jenkins
# Add a user
sudo adduser --disabled-password jenkins

# Add a new password for the jenkins user
sudo passwd jenkins

# Login to the Jenkins user
su jenkins


# Create the "jenkins-agent" directory under /home/jenkins
mkdir -p /home/Jenkins/jenkins-agent
In Master Jenkins Node
Login to the dashboard and create a user
username : admin
password: <YOUR PASSWORD>
Install the Standard Plugins
Setting up the Jenkins Agent/Slaves using SSH Keys
Follow the instructions carefully
[Log in to the Slave Jenkins Server as the Jenkins User]
Add a .ssh folder in the Jenkins Slave Server
mkdir ~/.ssh && cd ~/.sshCreate the SSH pair using the ssh-keygen [Hit Enter on Each step after running the command to avoid confusion]
ssh-keygen -t rsa -C "Access key for Jenkins slaves"Add the public key to the authorized_key using the following command
cat id_rsa.pub >> ~/.ssh/authorized_keys
Observe the changes in the private key and keep a copy of that we will need during the integration of the Jenkins Slave Server and Jenkins Master Server.
cat id_rsa
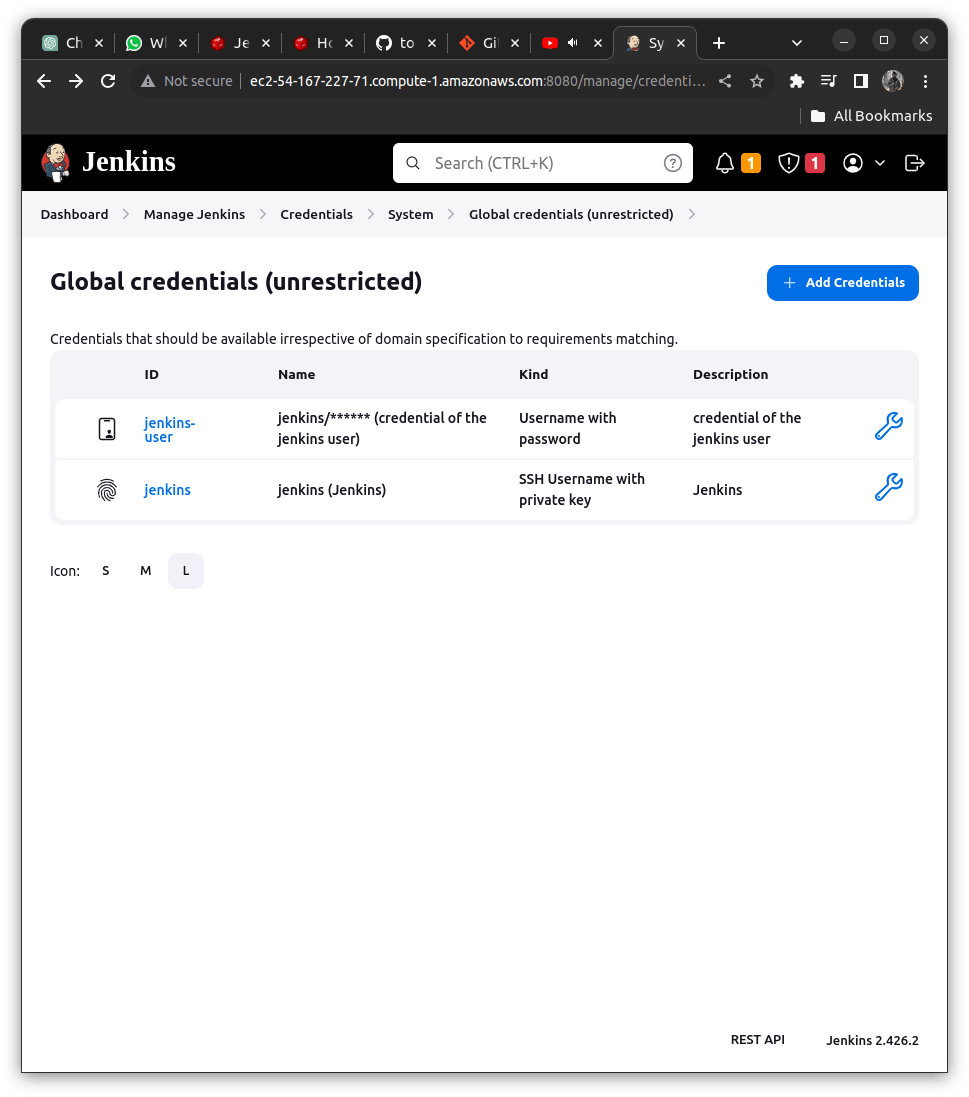
Add the SSH Private Key to Jenkins Credentials [MASTER]
- Go to the Jenkins Dashboard => Credentials => Global Dashboard => Add Credentials and enter the details
kind: SSH Username with Private Key
scope: Global
ID: Jenkins
#Check the Pricate Key and Enter Directly()
Key: Enter the copied Private KEY WHOLE <With the beggining and ending text>

#Hit Create
Setting up the Jenkins Agent/ Slaves in the Master Jenkins Node
Go to dashboard => Manage Jenkins => Nodes
Create a New Node with the following Details
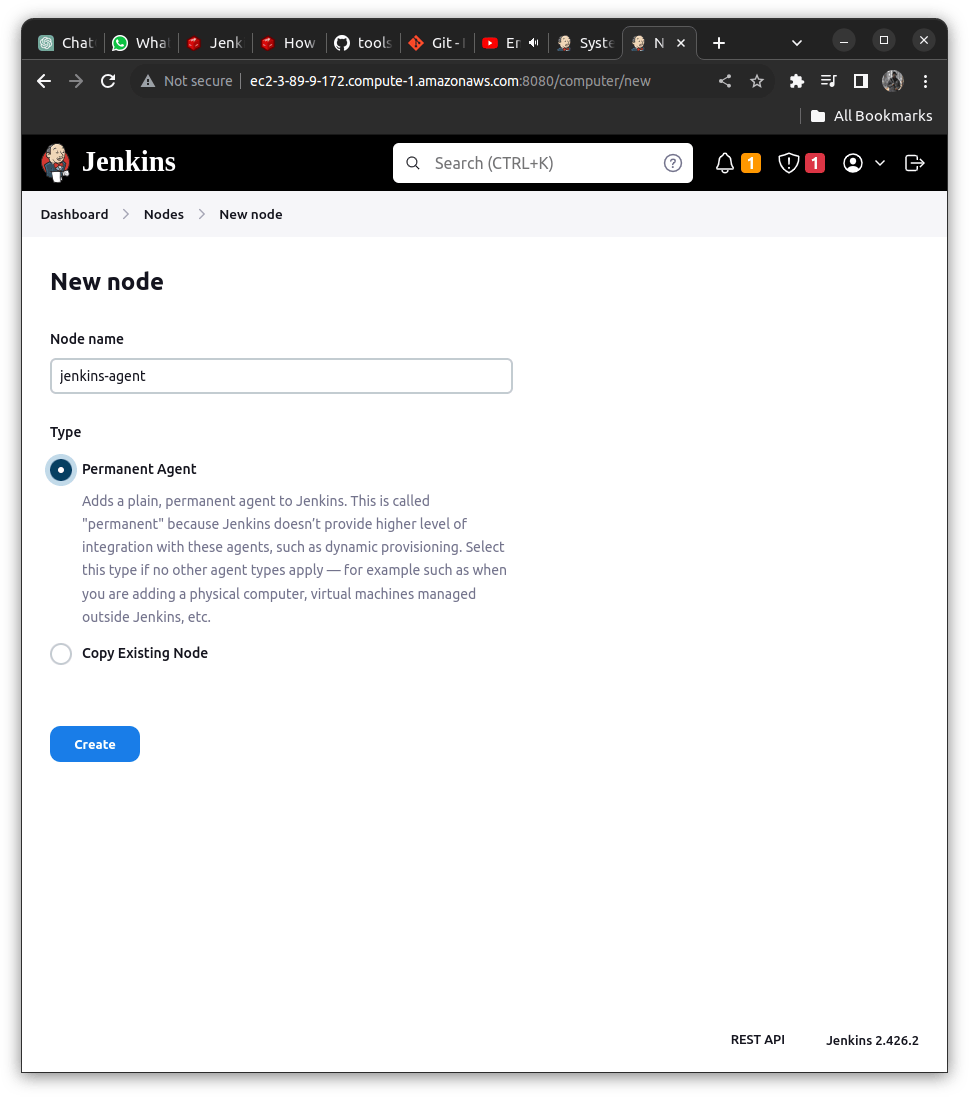
Add the fields which are required as follows:
Remote root directory:
An agent needs to have a directory dedicated to Jenkins; we need to add the path to the directory on the agent.
[NOTE]: Agents do not maintain important data all job configurations, build logs, and artifacts are stored on the controller.
Giving Agent a directory enables it to maintain the data persistence; even if the agent goes down by chance it will again boot up and use the cached data that prevents downloading of tools or checking out source code again.
LABELS:
Labels are used to group multiple agents into one logical group
It can be used in a situation where we want a particular job to run on RedHat systems only so we can mark all the agents to have the same label set on each agent; it would ensure that the job runs on the correct agent and not runs on any label which does not have that label.
USAGE:
We can seat the usage on the base of the same labels or use it as much as possible; (available in dropdown).
Launch METHOD:
There are 2 methods by which we can connect to the start of the Agent
a> Launch agent by connecting it to the controller
b> Launch agents via SSH (Using this)
- Starts an agent by sending commands over a secure SSH connection. The agent needs to be reachable from the Jenkins controller, and you will have to supply an account that can log in on the target machine. No root privileges are required.
HOST:
In the HOST is the Instance that we want to use as the Jenkins Agent for adding to our master jenkins server we need to provide the IP Address of the Slave Node that we have created.
Host Key Verification Strategy:
We are using the Non-verifying strategy as we have already added our private key to the Jenkins Master.
So overall with all these fields filled, it will look as follows
Remote Root Directory: /home/jenkins/jenkins-agent
Labels: Jenkins-Slave (Keep it somewhere safe we will need it afterwards)
Launch Method : Launch Agent via SSH
HOST: <IP Address of Slave Jenkins>
Credentials: < Add Creds. generated for the Slave here>
Host Key Verification Strategy: Non Verifying Verification Strategy

Hit Save => Move back to the Nodes we will get the agent running!
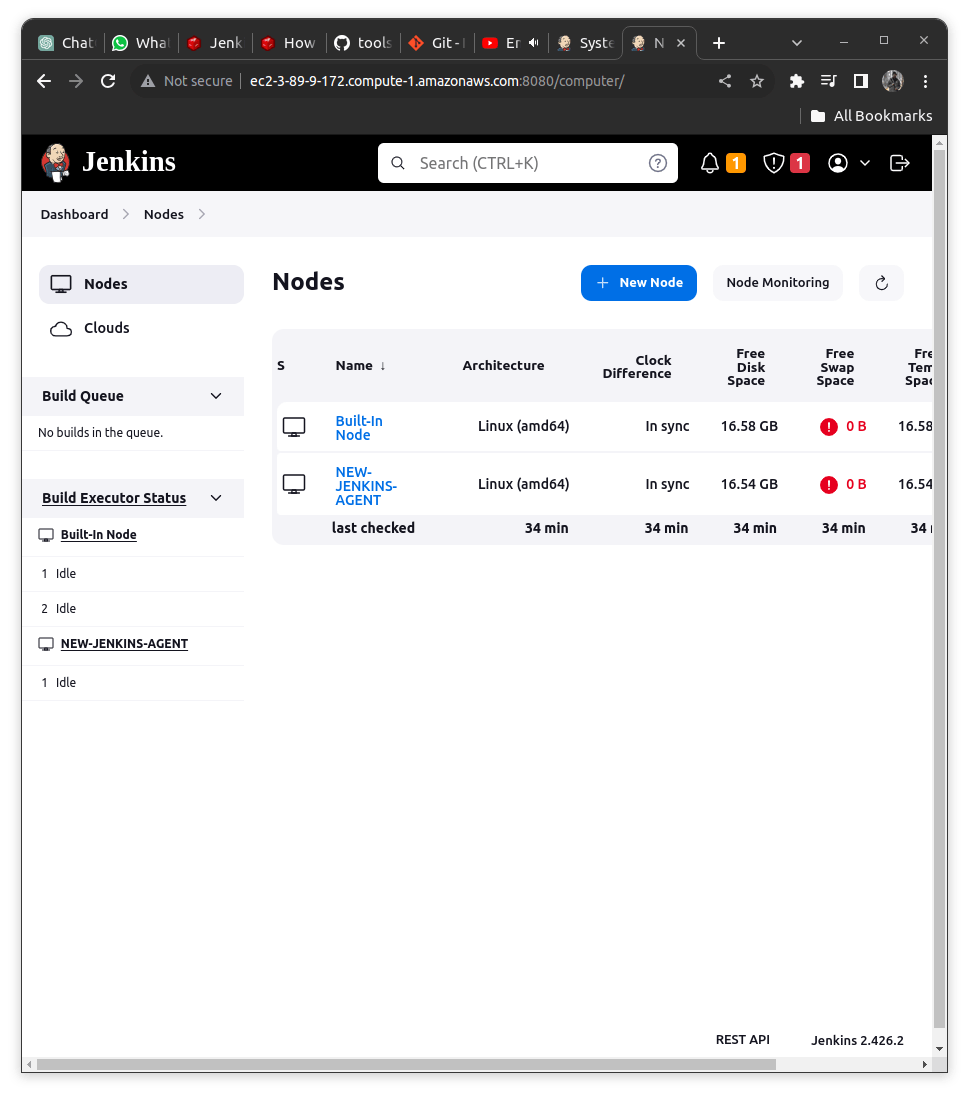
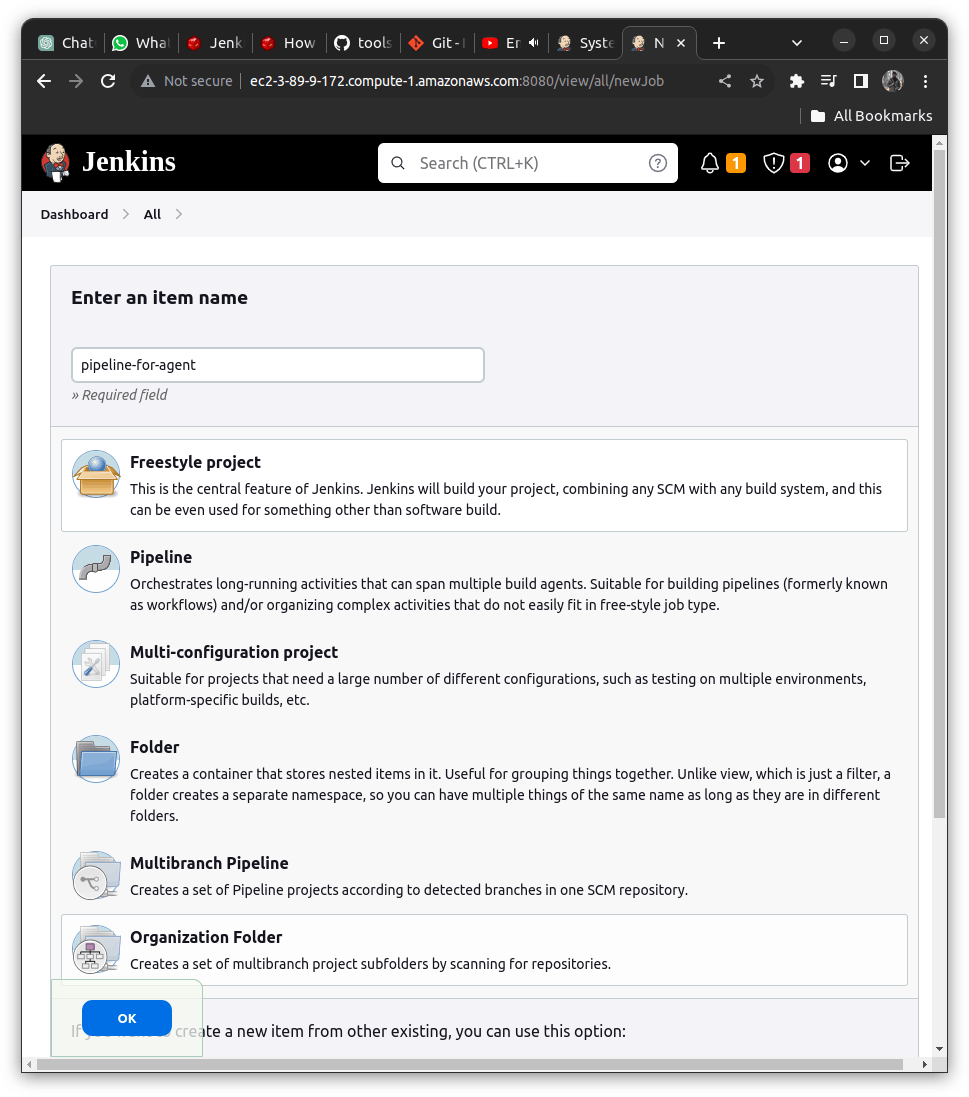
Verify Agent running by running a Job on Jenkins Master Node
To verify if our agent is correctly running or not we can do a sample freestyle project;
Add details as below
In Configuration => Build Steps => Execute Shell => Add a command
echo "The pipeline is from the Master Jenkins Node"
echo "This is a sample pipeline here that we need to follow in Agent"
[MUST] Check for the option: Restrict where this project can be run
In the Label Expression add the label that was added while creating the NODE (It may vary with the example below)
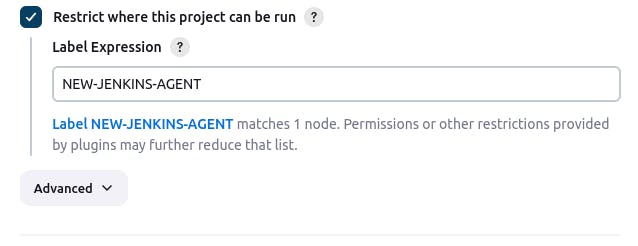
Hit Apply and Save => Click on Build Now
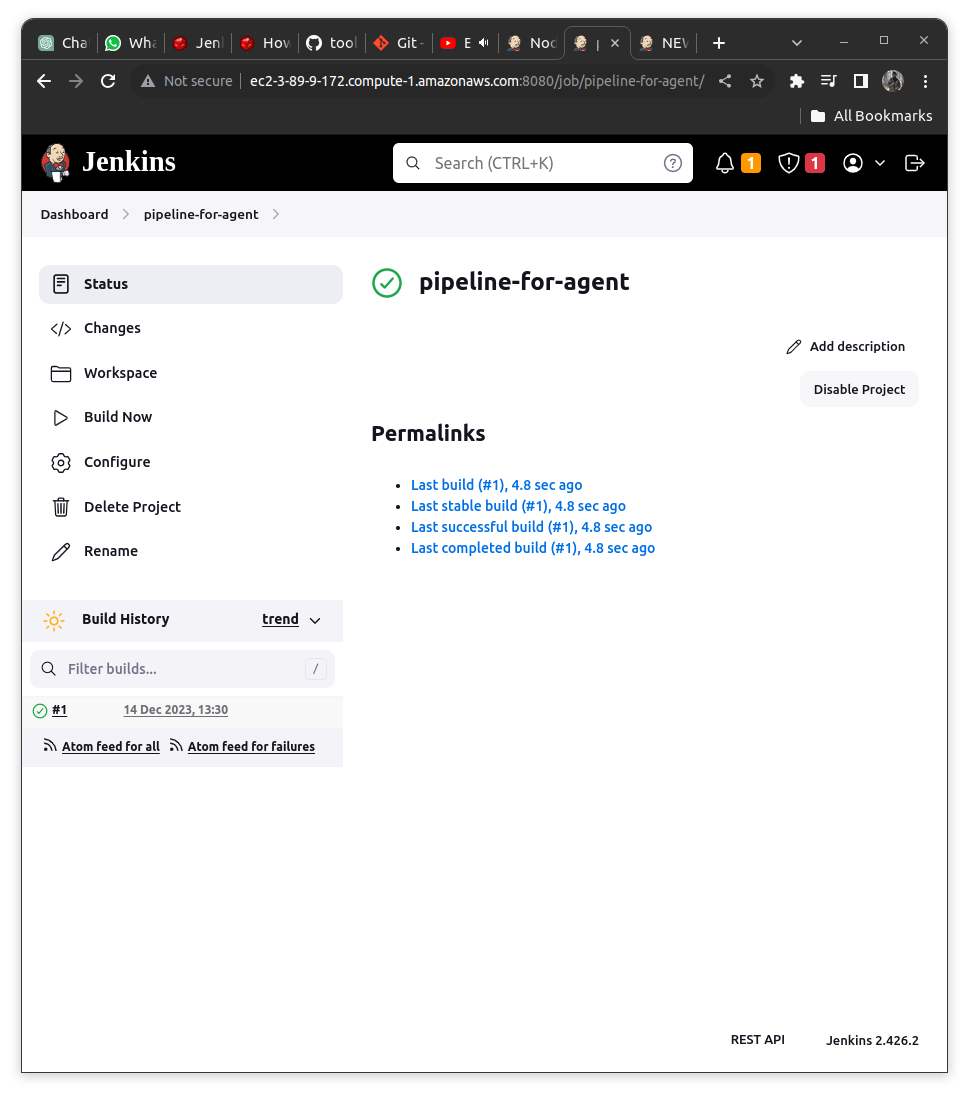
Verify the Jenkins Master Dashboard (The pipeline is not executed here)
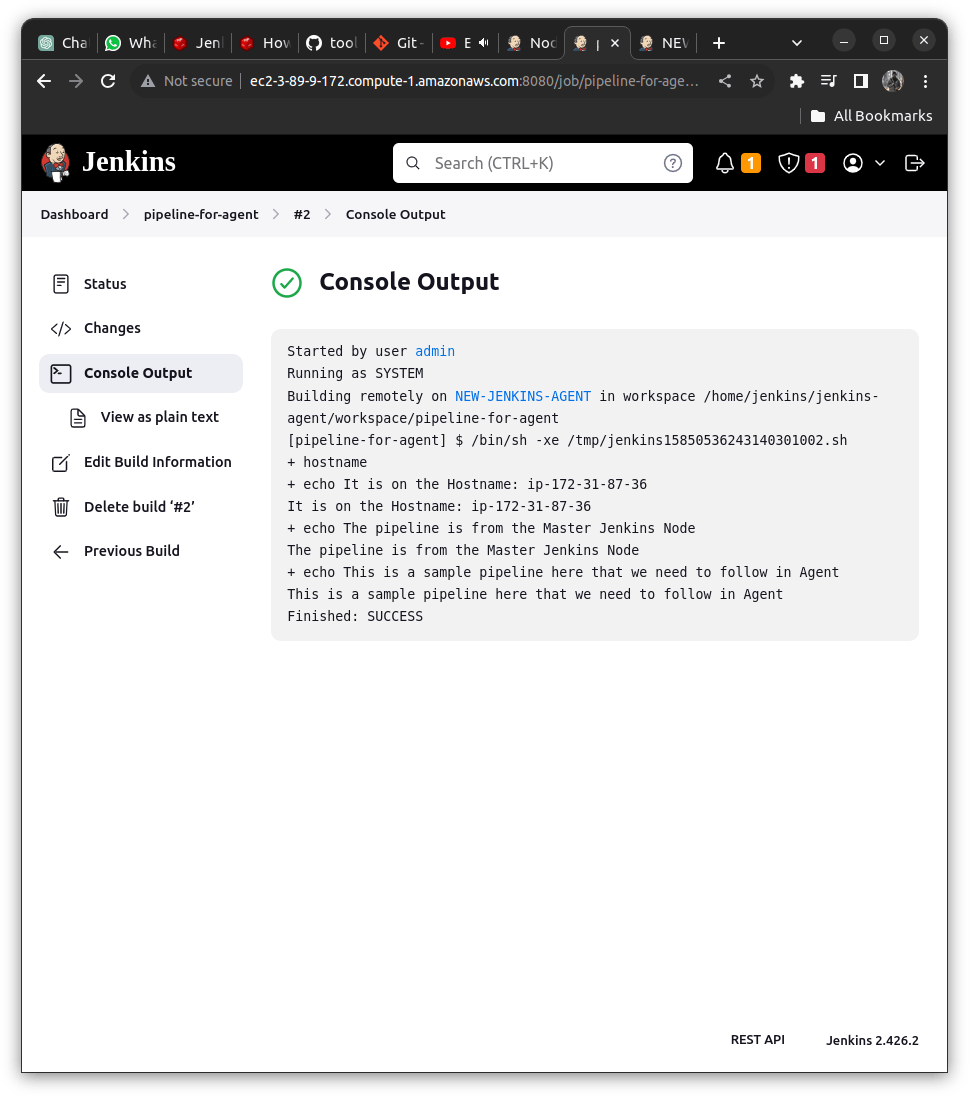
Again Check the Console Output of the pipeline we will get it as below
Building remotely on the NEW-JENKINS-AGENT[LABEL of the Slave Node]
It is running on the workspace: /home/jenkins/jenkins-agent/workspace/pipeline-for-agent
It infers that our connection with the Jenkins Slave Node has been established properly.
If you like this content do try to implement it yourself; you will gain some confidence. Thanks for going by I hope you like the content putting a heart will give a boost to my morale to post such amazing content to you guys.
Till then chill out and cheers
Do follow my endeavors here